


Yes, you can absolutely upcycle old clothes, and you don’t need a sewing machine or formal training to start. The three fastest beginner wins:
- T-shirt → tote bag: Cut off the sleeves and neckline, tie or sew the bottom shut. Done in a short time, zero skill required.
- Jeans → shorts: Mark your length, cut, fray or hem. Beginner level, moderate time.
- Dress → elastic-waist skirt: Cut below the bodice, fold a waistband channel, thread elastic through. Basic hand-sewing only and takes a moderate amount of time.
All three use what you already own, cost next to nothing in supplies, and produce something genuinely wearable. The tradeoff is honest: results improve with practice, and your first attempt is a learning sample, not a finished product.
Table of Contents
- How do you prep a garment before upcycling it?
- Step-by-step beginner upcycle projects you can start this weekend
- What advanced refashioning techniques produce designer-style results?
- How do you pick the right project for what you actually have?
- Finishing touches and Room24 styling tips that make upcycled pieces look high-end
- What should you do with clothes you won’t upcycle?
- Key Takeaways
- The mindset shift that makes upcycling stick
- Room24: sustainable pieces that pair beautifully with your upcycled wardrobe
- Useful sources and further reading
How do you prep a garment before upcycling it?
Prep is where most beginners skip steps and pay for it later. Wash and dry the garment first, always. Fabric shrinks, and you want that to happen before you cut, not after. Then lay it flat on a hard surface, smooth out any wrinkles, and inspect every seam and stress point for damage.
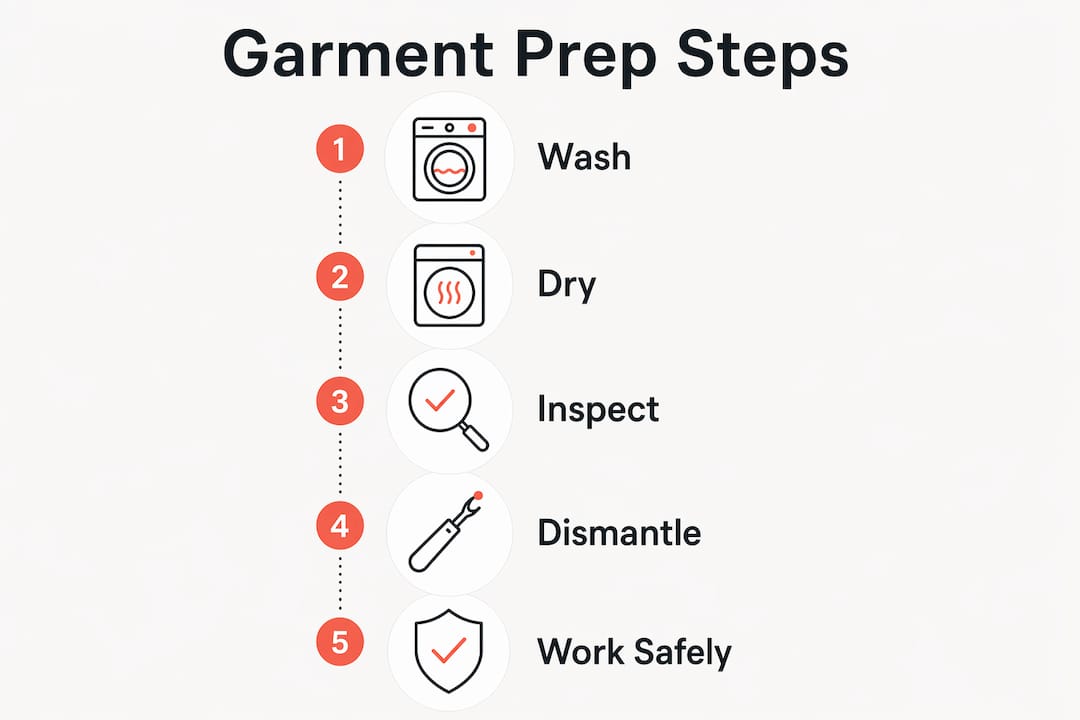
Before you cut anything, salvage what you can: buttons, snaps, zippers, and usable lining fabric all have future value. Press the fabric on the wrong side, aligning with the grainline, not the garment’s outer edge.
Essential tools:
- Sharp fabric scissors (keep them fabric-only so they stay sharp)
- Seam ripper
- Straight pins and tailor’s chalk or a disappearing-ink pen
- Flexible measuring tape and a clear ruler
- Hand-sewing needles and thread in a few neutral colors
- Iron (non-negotiable for clean results)
- Sewing machine: optional for beginner projects, genuinely useful for anything structural
Safety basics: Work with sharp tools on a stable cutting mat. If a garment smells musty or shows visible mold, bag it immediately and skip upcycling. Heavily dyed fabrics can bleed, so wear gloves when handling wet pieces and wash them separately.
Pro Tip: When dismantling seams, clip threads at intervals and pull them out rather than cutting along the seam line. This preserves maximum fabric surface area and keeps your options open for the new design.
Step-by-step beginner upcycle projects you can start this weekend
These three beginner-friendly projects are ordered by complexity. Each one builds on the last.
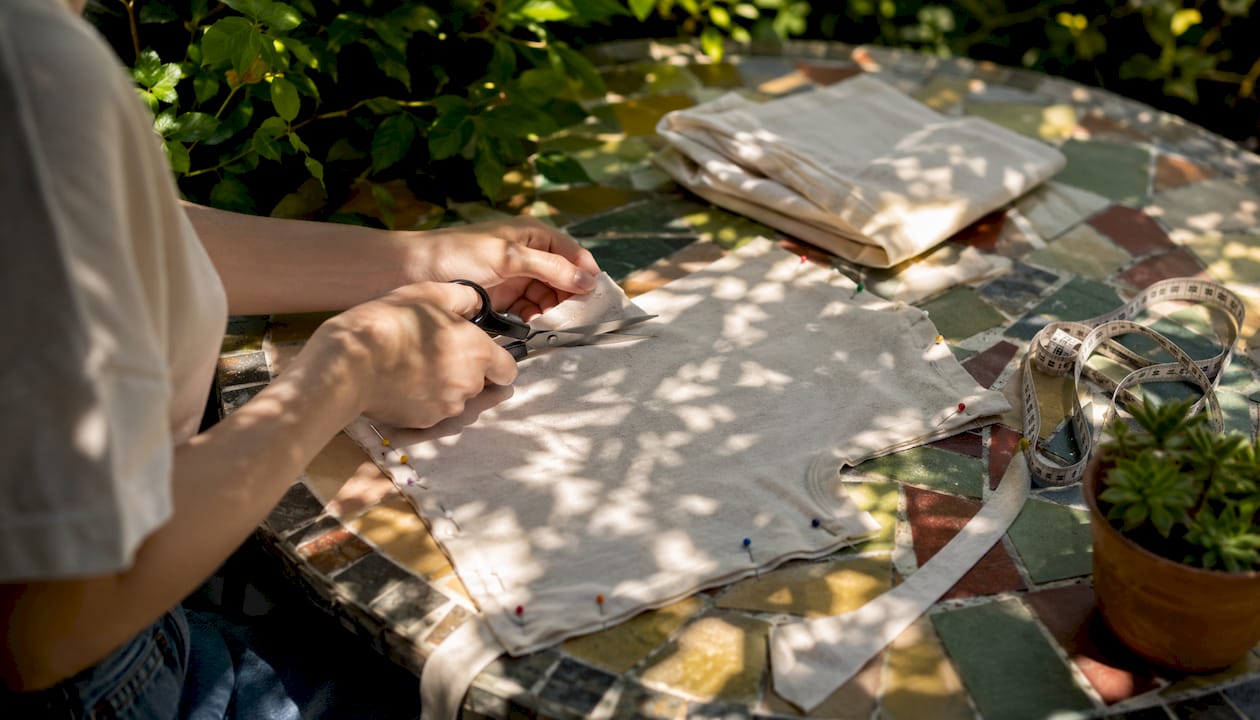
Project 1: T-shirt → tote bag
Difficulty: Beginner / no-sew | Time: 15–30 minutes | Cost: $0–$3
- Lay the shirt flat. Cut off both sleeves along the seam to create the bag’s handles.
- Cut a wide U-shape at the neckline to open the top of the bag.
- Trim the bottom hem off so you have a clean edge.
- No-sew version: Cut vertical strips (about 1 inch wide, 3 inches deep) across the bottom edge. Tie each front strip to its matching back strip in a double knot.
- Sewn version: Fold the bottom edge up twice and topstitch. Add a box-stitch at the base of each handle for strength.
- Turn right-side out, press with an iron.
Avoid: Cutting handles too narrow on a thin jersey — they’ll stretch and snap under weight.
Project 2: Jeans → shorts (or apron)
Difficulty: Beginner–intermediate | Time: 30–60 minutes | Cost: $0–$10
- Try the jeans on and mark your desired length with chalk. Remove them and lay flat.
- Use a ruler to draw a straight line across both legs at the mark. Cut about 1 inch below the line to allow for hemming.
- Frayed finish: Wash and dry as-is. Pull loose threads along the cut edge for a relaxed look.
- Clean hem: Fold the raw edge up twice and topstitch with a heavy-duty needle and denim thread.
- Apron variation: Harvest the waistband and use the legs as the apron body. The belt loops become tie points.
Avoid: Cutting both legs at slightly different angles. Measure twice on each side.
Project 3: Dress → elastic-waist skirt
Difficulty: Beginner | Time: 45–60 minutes | Cost: $0–$5
- Try the dress on and mark where you want the skirt waistband to sit.
- Cut straight across the dress at that point, leaving 1.5 inches above your mark for the waistband channel.
- Fold the top raw edge over 1.5 inches toward the wrong side and pin. Sew along the fold, leaving a 1-inch gap to thread elastic through.
- Cut elastic to your waist measurement plus 1 inch. Thread it through the channel using a safety pin.
- Overlap the elastic ends by 1 inch and sew them together securely. Sew the gap closed.
- Finish the hem if the original dress hem was cut away — a simple fold-and-topstitch works fine.
Elevation idea: If the original hem is intact and decorative, preserve it as the skirt’s bottom edge. It immediately looks intentional and polished.
What advanced refashioning techniques produce designer-style results?
Once you’re comfortable with basic cuts and hems, eight core techniques cover most of what intermediate and advanced upcyclers do: overlays, base-garment builds, recuts, splicing, pattern templates, strip-made fabric, compounding identical pieces, and recycling waste fabric.
Splicing multiple garments is the most visually striking. The key is matching fabric weight and grain direction before you commit. A denim yoke on a cotton bodice works because both fabrics are woven and similarly stiff. Mixing a heavy denim panel with a lightweight chiffon in the same structural seam will pull and distort.
Recutting to a new silhouette requires aligning your new pattern pieces with the fabric grain, not the garment’s original outer edge. Test the fit with a cheap muslin or an old sheet before cutting into the real piece. One garment refashioned into multiple pieces is entirely achievable with pre-planning and small prototypes.
Visible mending turns damage into a design decision. Sashiko-style running stitches in a contrasting thread over a worn knee or a small tear read as intentional embroidery, not a patch job. Embroidery floss, appliqué, and fabric paint all work here.
| Technique | Best for | Skill level | Key watch-out |
|---|---|---|---|
| Splicing garments | Statement pieces, color-blocking | Intermediate | Match fabric weight and grain |
| Recutting silhouette | Completely new shape from old fabric | Intermediate–Advanced | Always test with a muslin first |
| Visible mending | Repairing holes, worn spots | Beginner–Intermediate | Use colorfast thread to prevent bleeding |
| Knit-specific sewing | T-shirts, sweaters, jersey | Intermediate | Use a ballpoint needle; standard needles skip stitches |
Pro Tip: When working with knits, switch to a ballpoint or stretch-specific needle. A standard sharp needle punches through the loops in jersey fabric and causes skipped stitches or small holes that are nearly impossible to fix cleanly.
How do you pick the right project for what you actually have?
The NMSU inventory framework is the most practical starting point: sort every candidate garment into five categories before you touch scissors. Wearable as-is. Needs minor change. Needs major change. Usable fabric only. Donate.
Decision matrix by fabric type:
| Fabric | Recommended project | Difficulty |
|---|---|---|
| Denim | Shorts, tote, apron, patchwork | Beginner–Intermediate |
| Cotton knit (T-shirt) | Tote, crop top, headband, rag rug | Beginner |
| Woven cotton/linen | Skirt, pillow cover, garment conversion | Beginner–Intermediate |
| Wool/sweater | Mittens, felted accessories, poncho | Intermediate |
| Delicate (silk, chiffon) | Surface embellishment only | Advanced |
Condition checklist before you start:
- Small stain or hole in a non-structural area: cover with a patch or visible mending
- Structural damage (blown seam, broken zipper): repair first, then upcycle
- Fabric thinning or pilling throughout: cut into patches or rags only
- Mold or heavy soiling: do not upcycle; see responsible disposal below
Time vs. impact: A no-sew tote takes 15–30 minutes and is immediately useful. A spliced two-garment jacket might take several hours across two sessions. Both are worth it, but only if you match the project to the time you actually have this week.
Typical supply costs run low for basic items. More specialized supplies and a full sewing kit can increase costs but are an investment for regular use.
Finishing touches and Room24 styling tips that make upcycled pieces look high-end
The difference between a homemade-looking piece and a boutique-looking one is almost always in the finishing. Press every seam as you sew it, not just at the end. Use bias binding or a faced neckline instead of a raw edge on anything that sits near your face. Topstitching in a matching thread at a consistent ¼-inch distance reads as intentional and clean.
Laundering new seams: Wash upcycled knits in cold water on a gentle cycle and air-dry flat to prevent stretching. New sewn seams on wovens benefit from a first wash inside-out to reduce friction on the stitching.
Room24 styling insight: Upcycled pieces look most polished when they’re anchored by one refined item. A refashioned denim skirt paired with a sleek cutout bodysuit immediately reads as a considered outfit rather than a craft project. The same logic applies to an upcycled cover-up over a structured swimsuit. You can find more pairing ideas in Room24’s day-to-night styling guide.
Pro Tip: For a luxury appearance, match fabric weight and hand across the whole outfit. A lightweight upcycled skirt pairs beautifully with a matte jersey bodysuit. A heavy denim piece needs something equally structured to balance it.
What should you do with clothes you won’t upcycle?
Not every garment is worth the effort, and that’s fine. Responsible next steps:
- Donate: Charity shops and organizations like Goodwill or local shelters accept clean, wearable items. Call ahead to confirm what they currently need.
- Resell: Platforms like ThredUp, Poshmark, and Depop work well for branded or gently used pieces. Consignment stores are better for higher-end items.
- Textile recycling: For worn-out pieces that can’t be worn or upcycled, look for textile collection bins (H&M and many municipalities run programs) or mail-in services like TerraCycle.
- Professional restyler or tailor: Worth it for a beloved piece with complex structural damage. Expect to pay $30–$100+ depending on the work, so weigh that against the garment’s value to you.
- Heavily soiled or moldy textiles: Seal in a plastic bag before handling further. Do not donate these. Check your local waste authority for textile disposal guidelines.
Key Takeaways
Upcycling old clothes is accessible at every skill level: start with one garment, one project, and one hour, and the habit builds from there.
| Point | Details |
|---|---|
| Start with prep | Wash, dry, and inspect every garment before cutting to prevent shrinking and wasted fabric. |
| Match project to fabric | Denim and cotton are beginner-friendly; delicate or heavily worn fabric suits patches and small accessories only. |
| Finishing makes the difference | Press seams as you go and use bias binding or topstitching for a clean, boutique-quality result. |
| Treat early projects as samples | Mistakes accelerate learning; document iterations with photos to track improvement. |
| Room24 as your anchor piece | Pair upcycled items with a Room24 bodysuit or cover-up to pull the whole look together with a high-end finish. |
The mindset shift that makes upcycling stick
The hardest part of upcycling isn’t the cutting or the sewing. It’s resisting the urge to abandon a project the moment it doesn’t look perfect. Early attempts are supposed to be rough. That’s not a failure of taste or skill; it’s just how the learning curve works.
What actually helps is treating the first version of any project as a prototype. Photograph it, note what went wrong, and try again with a different garment. The second tote bag is always better than the first. The third one you might actually carry. One simple finishing move, like pressing a clean hem or adding a bias-bound neckline, can take a piece from “craft project” to something you’d genuinely wear out. That shift happens faster than most people expect, and it’s worth staying in the process long enough to find it.
Room24: sustainable pieces that pair beautifully with your upcycled wardrobe
Upcycling is one side of a sustainable wardrobe. The other is choosing new pieces that are worth keeping for years. Room24 designs women’s clothing with exactly that in mind: sculpted fits, sustainable materials, and statement silhouettes that work as anchor pieces alongside anything you’ve refashioned.

The bodysuits collection is the most versatile starting point. A sleek Room24 bodysuit grounds an upcycled denim skirt, an elastic-waist dress conversion, or a refashioned cover-up without competing with it. For summer styling, the cover-ups collection pairs directly with upcycled beach pieces and swimwear. Browse both collections at room24.co.uk and find the piece that makes your upcycled wardrobe feel complete.
Useful sources and further reading
These are the most practical references used in this guide, each suited to a different stage of the process:
- NMSU: Rags to Riches: Best for prep technique, grainline alignment, and the inventory framework for triaging your closet.
- Oxfam: 20 Upcycling Ideas: Strong on beginner project variety and the sustainability framing behind upcycling as a practice.
- MILLIEGOAT: How to Start Upcycling: Practical step sequences, mindset advice, and encouragement for first-timers.
- Cochenille Design Studio: Eight Techniques: The clearest breakdown of intermediate and advanced refashioning methods for readers ready to move beyond basics.
For technique-specific skills like sewing knits, installing invisible zippers, or working with bias tape, video tutorials on YouTube fill gaps that written guides can’t. Search the specific technique plus “beginner tutorial” and watch at least two versions before you start, since different teachers explain the same step differently and one will click for you.


